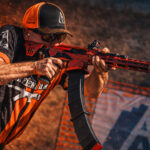
I have been a competitive 3-gun shooter since 2012. I loved the sport. It gave me a career at JP Enterprises, where I got to build rifles and eventually move into marketing. I was living the dream on paper.
But somewhere along the way, the thing that made 3-gun fun started to feel like a job. When your hobby becomes your career, and you are traveling to match after match on a schedule instead of because you are fired up to compete, it wears on you. I hit a wall. I was burned out.
At the same time, my wife was shooting NRL and PRS-style long-range matches. I would tag along, watch, and started noticing something. She was having the kind of fun I used to have. The pace was different. The community was tight. People were actually relaxed between stages instead of running around with a shot timer ticking in their head.
That planted the seed. I wanted to try precision rifle for myself.
This five-part series documents my journey from the run-and-gun world of 3-gun into long-range competition. I am building a complete PRS-ready setup from scratch, learning as I go, and sharing every step, including the failures, so you can learn from my experience if you are thinking about making the same jump.
In this first installment, I sat down with Adam Burt, who was the General Manager of JP Enterprises at the time of this series, to walk through the JP MR-19, the bolt-action rifle I chose as my platform. Let’s get into it.
Walking away from 3-gun felt weird. It had been my identity for years. But I knew I needed something that challenged me in a different way, and watching my wife compete in long-range matches showed me what that could look like.
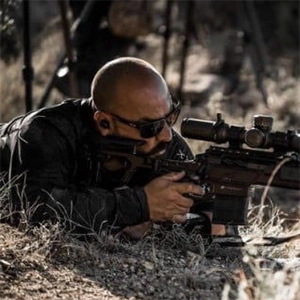
Precision rifle is a completely different animal from action shooting. Adam described it as a “thinking man’s sport” when we talked, and I think that nails it. Instead of sprinting between positions and engaging 4 MOA or bigger targets at close to moderate range, you are shooting at 2 MOA and smaller targets with more time to build your position, compose your shot, and read conditions.
The pace is more relaxed. More social. Adam even called it “more relaxing” than 3-gun, and from what I have seen at the matches I have attended, he is right. But don’t confuse relaxed with easy. Reading wind at 800 yards, building a stable position on some janky barricade, managing your DOPE card across a stage: that is a completely different kind of hard.
I am nervous. Genuinely nervous. It is the same feeling I had before my first 3-gun match years ago. I know there is a massive learning curve ahead of me, all new gear to figure out, and skills I have not developed yet. But that nervousness is also what tells me I am heading in the right direction. When competition stops making you nervous, it is probably time to find a new challenge.
One of the first things I wanted to understand was what I would actually be shooting at. In 3-gun, my rifle work was generally from up close out to maybe 400 or 500 yards. Precision rifle stretches that picture way out.
The specific distances depend on the match. PRS and NRL-sanctioned events typically place targets from 300 or 400 yards out to beyond 1,000 yards at some venues. Field-style matches, like Competition Dynamics events, sometimes throw in closer targets at 200 yards, which is why you will see some shooters running offset red dots or piggyback optics on their bolt guns. I had noticed that at matches and did not understand it until Adam explained the variety in stage design.
A typical match runs 10 to 15 stages, each with a time limit of about 90 to 120 seconds. You engage steel targets from various positions: prone, barricade, tripod, rooftop, kneeling, or whatever else the match director comes up with. Scoring is straightforward. You hit the steel or you don’t. No zones to argue about.
If you are coming from action shooting like I am, the range of engagement distances is both familiar and foreign. You know how to shoot. You just don’t know how to shoot like *this* yet.
Adam’s advice for anyone making this transition was simple: just show up. Bring whatever you have, be the humble new guy, and let the community help you figure it out. Precision rifle competitors are welcoming, same as 3-gun, USPSA, or any other discipline. Nobody expects a first-timer to know everything.
I plan to take that advice literally.
If you know JP Enterprises, you probably know them for their gas guns. Their small-frame and large-frame AR platforms have a strong reputation in competitive action shooting. I ran them for years in 3-gun, and they perform. The MR-19 is JP extending that same engineering approach into the bolt-action world.
JP has actually been in the bolt-action chassis game for over a decade. Most people don’t know that. This is not their first attempt. The MR-19 and the current APAC chassis represent their second generation, refined over years of testing with competitive long-range shooters.
For me, the choice was natural. I trusted JP’s engineering from years of running their gas guns in competition, and the MR-19 shares enough design DNA with their AR platforms that the transition felt familiar rather than like starting completely from scratch. If you’re still weighing platforms, our guide to choosing the best rifle for PRS walks through the decision.
The MR-19 runs $5,499 as a ready-to-ship configuration, which now includes a free second barrel. That is not cheap. But for a complete bolt-action competition rifle with a Proof Research barrel, Ultimatum Deadline action, and TriggerTech Diamond trigger in a purpose-built chassis, plus a spare barrel, the price sits in the range of what a fully built precision rifle costs when you piece those components together separately.
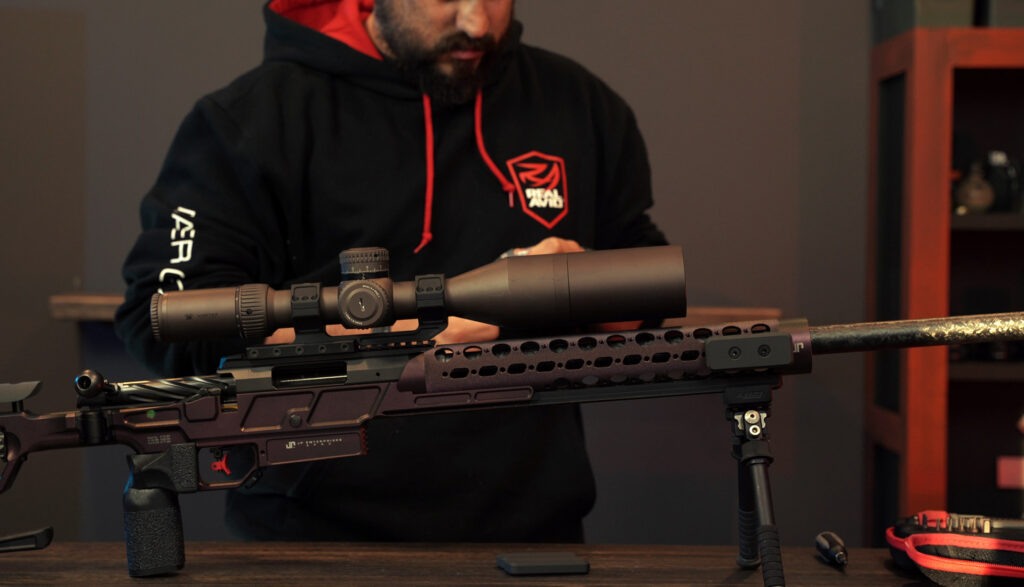
I sat down with Adam to walk through the platform piece by piece. Here is what stood out.
The APAC (Advanced Precision Ambidextrous Chassis) is the foundation of the MR-19. JP designed it with Brian Whalen, a retired U.S. Army sniper instructor and national precision rifle competitor, to address specific problems they saw with other chassis systems, particularly flex in the rear stock and adjustment mechanisms.
The butt pad, cheek weld height, and length of pull are all adjustable, which is critical when you are building stable positions in precision rifle. A rifle that doesn’t fit you is a rifle that fights you on every shot. The APAC uses locking wheels at each adjustment point, and according to Adam, those wheels eliminate all flex from the system once you have dialed in your fit.
The folding stock mechanism caught my attention. It is magnetically retained, so you have to push it off to fold it. When it locks up, Adam says it is as rigid as a solid piece of bar stock aluminum. No flex whatsoever. For transport and storage, it folds. For shooting, it locks tight. The APAC weighs 4.5 pounds as a standalone chassis.
There is an integrated bubble level built right into the chassis behind the action tang. At distance, even a slight cant translates into horizontal misses, so having a level you can reference without cluttering your scope’s field of view is a practical touch. I have been running a level on my .308 optic, so having it integrated into the chassis instead is a cleaner setup.
The whole thing is ambidextrous. Bolt handle pocket on either side, and the hinge system works identically for lefties. It takes standard AICS-pattern magazines with a beveled magwell for faster insertion, which is the common format in precision rifle.
Here is the detail that sold me: the APAC forend is patterned after JP’s MK III Rapid Configuration handguard design. I have been running JP gas guns for years. I have barricade braces, bench rest adapters, arca rail attachments, all of it. Those accessories transfer directly to the MR-19. That saved me real money and time that I would have spent figuring out a whole new accessory ecosystem.
The handguard runs a full-length arca rail down to the magazine well, with serrations at the front of the mag well to help lock the rifle into barricades and bags. Those are the kinds of details that come from people who actually compete with these rifles.
JP went with a TriggerTech Diamond, their top-tier flat trigger. According to JP, it is adjustable from around 4 ounces up to 2 pounds, though JP ships it set toward the higher end for liability reasons.
Adam told me they tested dozens of trigger options in-house before landing on TriggerTech. The Diamond shows up frequently on rifles at national-level precision rifle matches, and the flat face has become the standard preference for most precision rifle shooters. The break is clean, and it handles dusty, debris-heavy field conditions without issue, which is exactly what I will be dealing with at PRS and NRL events.
This is where the MR-19 steps away from the traditional Remington 700-style two-lug design that dominates most of the bolt-action market. The Ultimatum Deadline action features a three-lug, 60-degree bolt throw, shorter than the standard 90-degree lift.
A shorter throw means faster cycling between shots. But 60-degree actions have historically come with a trade-off: a heavier bolt lift, because you are compressing all the cocking effort into less movement.
Ultimatum addressed this by splitting the cocking bias 50/50. Half the effort on bolt open, half on bolt close. The result, according to Adam, is a noticeably lighter bolt lift. He explained why that matters for competition: when you are trying to stay on target through the bolt cycle to spot your impact or miss, a heavy lift pulls you off your sight picture. With the split cocking, you can cycle the bolt without losing what you are looking at through the scope.
One thing worth noting: the Deadline is not a true drop-in for every Remington 700 chassis on the market. Some R700 chassis and stocks require fitting work to accommodate the Deadline’s oversized bolt body. JP built the APAC around this action, so the fit is dialed, but if you are thinking about dropping a Deadline into a different chassis, verify compatibility first.
Coming from gas guns where the rifle cycles itself, learning to run a bolt efficiently is going to be part of my learning curve. Having a smooth, light action should make that easier.
The barrel is a Proof Research cut-rifled blank in 416R stainless, contoured and chambered specifically for the MR-19. It runs 26 inches with a contour that tapers to 0.75 inches under the handguard. From there, JP applies their own processes, including a cryogenic stress relief treatment for thermal stability and their signature thermal dissipator.
If you have shot JP gas guns, you know the thermal dissipator. It is a deep-finned aluminum sleeve that, according to JP, increases barrel surface area by over 700%. In practical terms, the goal is to maintain consistent points of impact during extended strings of fire so your tenth shot from a warming barrel lands where your first shot did instead of drifting out of the group. That consistency matters in match conditions where you might be shooting rapid positional stages back to back.
The MR-19 ships with JP’s two-port large-profile compensator, blended into the barrel. It is removable if you want to swap it out.
I am planning to run a suppressor. Adam gave me some grief about that, joking that he is a “gentleman” who shoots with a can while I have been running comps on gas guns for years. He was straightforward about the trade-off though: a muzzle brake mitigates recoil better than a suppressor and keeps you on target between shots. A suppressor is more comfortable, especially in confined shooting positions at some match stages.
For me, the suppressor makes sense. For competitors who don’t run one, the JP comp handles recoil and helps you stay on glass for follow-up shots.
No product walkthrough is complete without the other side.
The MR-19 is a proprietary platform. The APAC chassis, the action integration, the thermal dissipator system: these are JP-specific. If something needs service, you are going through JP. You are not swapping in aftermarket parts the way you would on a Remington 700 clone.
At $5,499, it is a significant investment for a discipline I have never competed in. That is a real consideration. Adam’s “buy once, cry once” advice is valid, but there are competitive bolt-action rifles entering matches at lower price points. The MR-19 sits at the high end of what competitors run in PRS and NRL.
The rifle weighs 11.6 pounds before glass and accessories. That is within the competitive range for PRS (most shooters run rifles in the 10 to 14 pound range with optic), but it is a far cry from what I am used to running in 3-gun. Carrying it through field stages will be a different experience.
After “just show up,” Adam’s second piece of advice was to buy good equipment from the start.
In precision rifle, the gear ceiling is high. A quality rifle, optic, and support equipment will not limit your growth as a shooter. Cheap gear absolutely will. Precision rifle punishes equipment shortcuts more than most disciplines. A sloppy trigger, a flexible chassis, or an optic that will not track accurately at distance will mask your actual skill level and make it harder to figure out what you need to work on.
I have heard the phrase “buy once, cry once” for years, and it applies here more than anywhere. That does not mean you need to buy the most expensive option in every category. It means you need equipment that will not be the bottleneck in your development as a shooter.
Here is a reality I am dealing with: I am in Minnesota. My home range maxes out at 400 yards. That is plenty for 3-gun work. For precision rifle, where match targets stretch past 1,000 yards, it is nowhere near enough.
My solution is the JP Apparition, a .22 LR bolt-action built on a Vudoo Gun Works V-22 action in a Remington 700 footprint. It drops right into the APAC chassis. Same manual of arms, same ergonomics, same cheek weld as my centerfire MR-19, but shooting .22 LR out to 200 yards.
At 200 yards with a .22, I am still working wind calls and elevation holds. I am building positions and running through the same fundamentals I will need in competition. And I am doing it at a fraction of the ammo cost, which matters when you are trying to build volume in your training.
It is not a perfect substitute for shooting 6.5 Creedmoor at 1,000 yards. But it is a practical way to build reps when your range does not go that far.
Dry fire rounds out the plan. Between the Apparition trainer and disciplined dry fire sessions, I have a path to build the core skills I need without burning expensive match ammo or driving hours to find a long-range facility.
This first episode sets the foundation: my motivation, the rifle platform, and the reality of what I am walking into as a complete beginner in this discipline. But the rifle is only part of the equation.
In Part 2, I am heading to Vortex Optics to learn about long-range glass. I know optics for action shooting inside and out. But precision rifle scopes are a completely different world: the reticles, turret systems, magnification ranges, and weight trade-offs for field matches are nothing like what I run in action shooting. I need to figure out the right glass for both the MR-19 and the Apparition trainer.
The rest of the series covers support gear, first training sessions, and my first match experience. I am going to share all of it, especially the mistakes.
If you are a 3-gun or action shooting competitor thinking about making this jump, follow along. I am learning in real time so you don’t have to figure it all out from scratch.
Active competitor across 3-Gun, PCC, and precision rifle, Dustin has been deep in the multigun world since the Minnesota 3 Gun Group days. He joined JP Enterprises as a rifle tech in 2015 and grew into marketing and team representation, giving him a ground-level understanding of how competition drives rifle design. Along the way, he's represented brands like Remington, Burris Optics, and Real Avid — building a career that spans the workbench, the marketing side, and the firing line. As an Action Gunner co-founder, he's been behind the camera and on the stage since day one.
The most comprehensive major match calendar in competitive shooting. Plan your season.
View Calendar